CMM Measurement

CMM MEASUREMENT

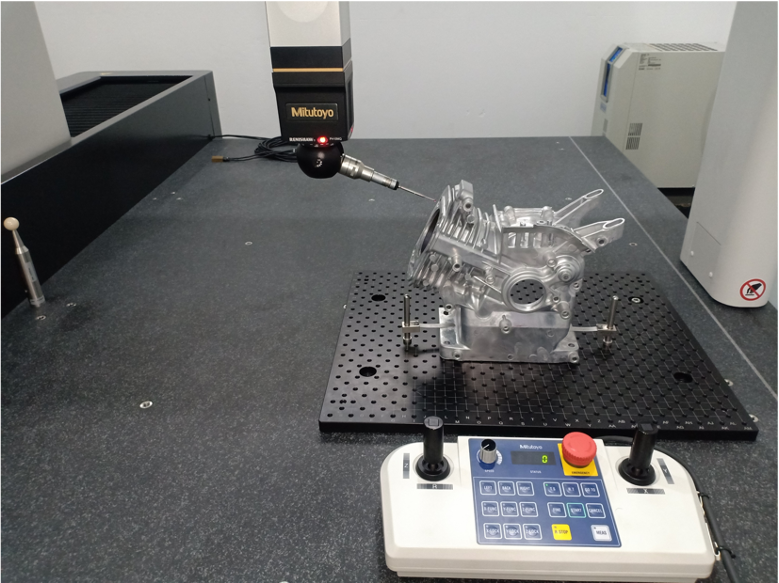
We provide CMM Measurement service for various type of part, especially for aluminium die casting parts, and also parts from other materials.


DEFINITION of CMM

CMM also know as Coordinat Measuring Machine is a multi-functional measurement tool, for measuring the geometry of physical objek, by touching the surface of the object with probe sensor that provide the outputs of measurement with high accuracy and efficiency.


ADVANTAGES of CMM

  • The measurement results has high precision and accuracy.
  • Various character of measurement can be measured such as Flatness, Straightness, Roundneess, Cylidricity, Angularity, Profile Surface, etc.
  • Result of measurement data, can be obtained faster and can be printed immediately.

MEASUREMENT COST

Measurement cost is calculate by considering the following points :

  • The number of points that measured.
  • Quantity of part that measured
  • Total time required for measurement.
  • Size of part that measured, etc
cmm measurement

Our CMM Machine

  • Brand : MITUTOYO
  • Type : Crysta Apex S9106
  • Range : (XYZ) 900 x 1000 x 600
  • Accuracy : 1.7 + 3L/1000 μm
  • Resolution : 0.0001 mm

CAT-1000S SURFACE ANALYSIS

For some products with freeform surfaces that need to be checked and compared with CAD-data, we can measure the data using the Computer Assisted Technology CAT-1000S (Surface Analysis).


WHAT IS CAT-1000S

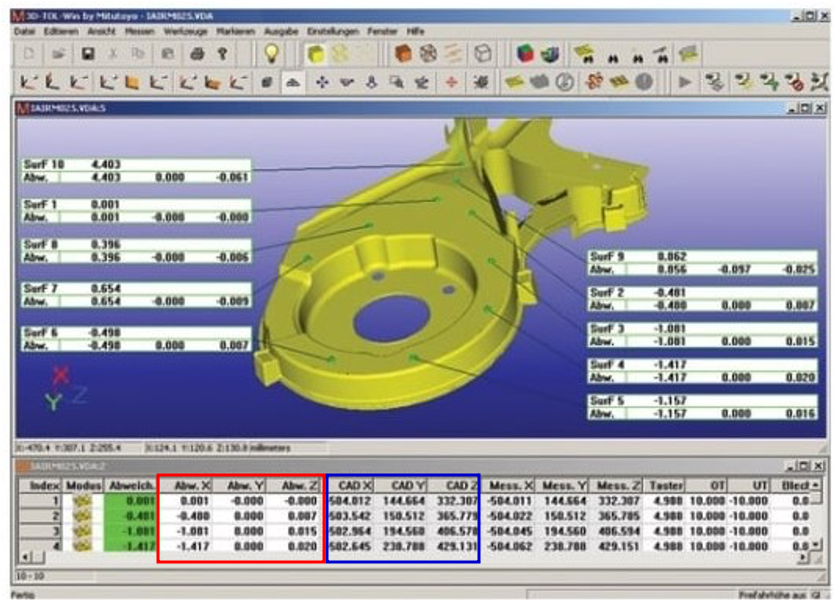
CAT-1000S is a very versatile tool from MITUTOYO that can be used on CMM, capable as a surface analyzer of measuring products / objects by comparing the results of actual number that read from the CMM measurement with CAD data that is owned. With results or graphical output that shows any differences so that features outside the tolerance can be identified immediately.


ADVANTAGES of CAT-1000S

Real time surface disposition is displayed by showing the difference of colour class, to determine if there is any part or feature in the objects that is different with CAD Data.

EXAMPLE OF APPLICATION CAT-1000S

cmm measurement
  • The numbers inside the red box are result of measurement data (XYZ) from actual product.
  • The numbers inside the blue box are coordinate (XYZ) from CAD-data.

Please feel free to contact us if you need any further information.